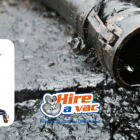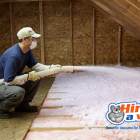
Blown-in insulation is one of the best ways to make your attic more comfortable and energy efficient. However, if you have blown-in insulation in your attic that needs to be removed, it can be a challenge. Not only do you have to remove the insulation, but also clean up all of the debris that’s left behind as well as ensure proper disposal methods are used. If you’re having trouble getting rid of your old insulation due to its location or condition, we can provide assistance!
Inspect Your Attic Insulation
Before you begin all of the work of removing blown-in insulation from your attic, it’s important to inspect the insulation that you have. This is because there are two main types: batt-style and blown-in. Batt-style is applied as a blanket in layers, while blown-in is applied by a machine with an air hose and nozzle.
Blown-in insulation comes in several different types, including fiberglass (or cellulose), mineral wool (rock wool),
Signs of infestation – Blown-in insulation can be cozy for mice and squirrels, which means that if you see or smell signs of nesting in your attic, then the process of removing old blown insulation will release toxic air pollutants during this removal.
Mold or water damage – If you see black streaks or spots, or any sign of water damage in the attic—such as a musty smell—the insulation removal could stir up mold spores.
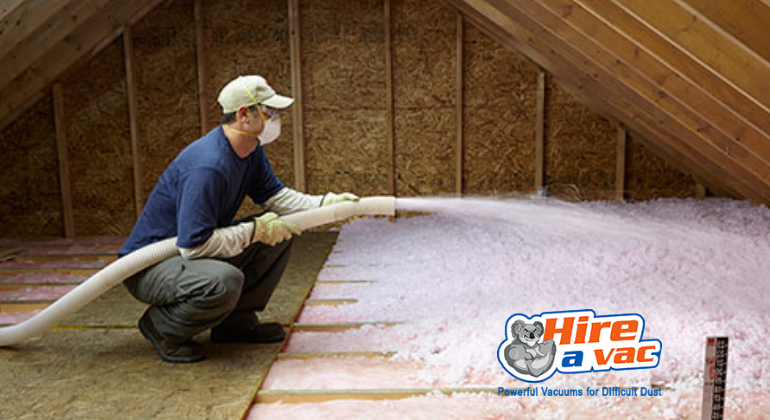
Step 1: Remove the old Insulation
The first step in removing blown-in insulation from your attic is to remove the old insulation. This can be done by hand, with a vacuum cleaner, or with an insulation removal machine. Before you begin, make sure you have all of the necessary tools for removing insulation and that you’ve chosen the right equipment for the job. For example, if you’re working on your own, consider renting an insulation removal machine from your local rental store rather than trying to do this work by hand.
Step 2: Find out the amount of insulation to be removed
The second step to removing blown-in insulation is to figure out how much you’re going to have to remove. This can be difficult, but it’s important that you know the amount of insulation in your attic so that you don’t end up removing too much. If there are any gaps between the blown-in insulation and your rafters or ceiling joists, this will make figuring out how much needs to be removed even more challenging.
When using a tape measure, take measurements from at least three different points on each side of the attic space and average them together. It’s best if these measurements can be taken directly over rafters or ceiling joists (or other flat surfaces) so that any dips caused by unevenness are minimized as much as possible. This will help ensure an accurate reading of where exactly all of the blown-in insulation has been installed throughout your ceiling.
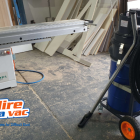
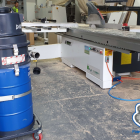
Step 3: Choose the right Industrial Vacuum Machine for your use
Choosing the right Industrial Vacuum Cleaner for your use is critical. Here are some questions to ask yourself:
- Will it be able to clean out the entire attic?
- Is it powerful enough to remove all of the insulation?
- Do I need a self-propelled or portable model that can easily be moved around in my attic?
When choosing an Industrial Vacuum Machine, make sure you get one from a reliable supplier who can provide you with expert advice on which machine will work best for your needs and budget.
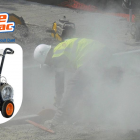
Step 4: Rent the Right Equipment from a Reliable Supplier
After you’ve determined the type of insulation that needs to be removed and have decided on how much you need to remove, it’s time to Hire an Industrial Vacuum cleaner from a reliable supplier. If you’re working alone, you’ll want a machine that can handle the job safely and easily. If someone else is helping you, they’ll need their own machine as well. Here are some things to consider when choosing your equipment:
- Power – Choose a powerful machine that can handle large amounts of insulation quickly
- Safety – It’s also important for both machines to be safe for use in an attic environment
- Ease of Use – Make sure the model is easy-to-operate
- Check the cost – a low monthly or Weekly rate is best.
Step 5: Clean up the space
After you’ve removed the blown-in insulation, you’ll have to clean up any loose insulation and debris that’s in your attic. You might also want to consider cleaning the roof shingles above where you poured in the blown-in insulation since it can sometimes leak down onto those areas.
Make sure there are no pieces of loose insulation or debris left behind—if there are, these could cause problems during future home inspections or when selling your house.
Step 6: Ensure disposal guidelines are followed
The last thing you want to do is flout federal regulations and risk getting in trouble with your local municipality. To ensure that you’re disposing of the blown-in insulation properly, read the packaging and follow its disposal guidelines. For example, if it says that you should dispose of it in a dumpster or recycling center, then that’s what you should do.
Step 7: Decide if blown-in insulation is right for you.
If you’re thinking about having blown-in insulation installed in your attic, first ask yourself these questions:
- Do I want to do the work myself?
- Can I find an experienced installer in my area?
If the answer to both these questions is yes, then you’re ready to move on. If not, there are two other options that might be better for you:
- Have a professional installer come in and install blown-in insulation for you (you’ll need to pay him or her for this service) or…
- Install it yourself using an open-cell spray foam product from a local store or hardware chain like Home Depot or Lowe’s
Step 8 – Make sure there’s no moisture damage in your attic!
Once you have removed the blown-in insulation from your attic, make sure to check for any signs of water damage. Moisture can be a big problem if left unchecked, so take a look at how much insulation was blown in and what shape it’s in. If there are large amounts of water or mold damage, it might be better to call a professional contractor to help with this step instead of doing it yourself; otherwise, you can clean up the mess yourself very easily.
Clean Up and Dispose of Removed Insulation
Once you have removed the blown-in insulation from your attic, it is time to dispose of it. While this might sound like an easy task, there are a few things you need to consider before you simply toss old insulation in a dumpster or trash can.
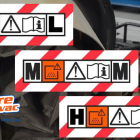
First and foremost, always consider safety when handling any material that has been sprayed into your home’s walls and ceilings. As mentioned above, the chemicals used in blown-in insulation are not immediately toxic but can still cause respiratory irritation if they make contact with skin or mucus membranes (think eyes).
Next, think about how the discarded insulation will affect others around you. If you plan on dumping the old material at an open ground site near residential areas or public parks (which some people do), be aware that it could end up being picked up by children who may mistake it for candy or other food items and ingest it without knowing any better—or worse yet choke on something small enough to fit into their mouths but too large for them to swallow properly.
Finally—and most importantly—you should dispose of your unwanted insulation in such a way as not to harm other living organisms: humans included!
Ready to Partner with Professionals on Attic Insulation Removal?
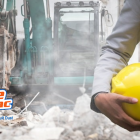
Before you get started, it’s important to understand that there are certain things you can’t do on your own. If you have a lot of insulation in your attic, hiring a professional is the best solution for removing it. A professional will make sure the job gets done right and in a timely manner. They’ll also know how to properly dispose of the blown-in insulation so that it doesn’t cause any harm to people or animals once it’s been removed from your home.
They’ll have all the equipment necessary for removing the blown-in insulation, including:
- Vacuum cleaners designed specifically for this purpose
- Carts are designed with wheels so they can be easily pushed around an attic space.
- Vacuum bags designed for this purpose will be used to collect the blown-in insulation from your home
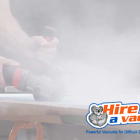
Do You Require An Insulation Removal Vacuum Or A Need To Clean Roof Cavities?
Call our technical team now for a consultation. 𝐓𝐨𝐥𝐥-𝐟𝐫𝐞𝐞 +𝟔𝟏 𝟏𝟖𝟎𝟎 𝟒𝟑𝟖 𝟖𝟐𝟐 or Email Us On 𝐛𝐨𝐨𝐤𝐢𝐧𝐠𝐬@𝐡𝐢𝐫𝐞𝐚𝐯𝐚𝐜.𝐜𝐨𝐦.𝐚𝐮
Conclusion
So if you’re thinking about removing your existing blown-in insulation and installing new blown-in insulation, here are some things to ask the Insulation Expert before getting started: